Cyclofiend.com:
Current Classics Bicycle Photos: Decal Info
![]()
|
In
addition to supplying some nice photos of his Centurion
Mixte Project,
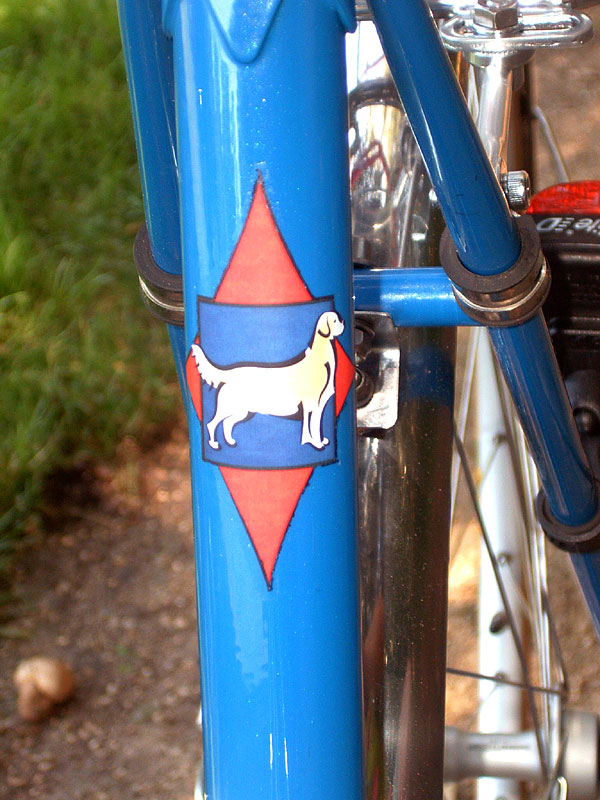
Special Note on the Decals on this Project
The laser printer decal paper comes in three varieties - a transparent version, a white background version, and a transparent version with blue backing. These varieties have to do with the way you treat the color white in the decal. Most printers don't have a white ink, instead depending on the background paper for the white. But in decals, you usually want to be able to slide the decal off and have the borders be transparent. This constitutes a problem if you have a regular printer and want to print decals. This is where the three varieties of decal paper come in. The transparent decal paper will be transparent where you don't print anything. This is fine if your decals are almost all dark colors and you are putting them on a light background paint. The white background decal paper won't be transparent ANYWHERE, but it will be white any place that you don't have ink. The last version, the blue-backed transparent decal paper, is designed for a special printer by ALPS that DOES have a white ink cartridge. The light blue background lets you see if you got good white coverage. But the blue-backed version is useless unless you have one of these ALPS printers. So I got a package that combines the transparent-backed decal paper and the white decal paper, 15 sheets of each. For the down tube decal, I printed the word "Tyrone" in a Art Nouveau font with the base color in red and the letters outlined in black. When I put it on the down tube, the blue color of the frame showed through the red and made the base color a dark violet. The black outline remained black. This wouldn't work for the seat tube design, since I wanted a nice light golden retriever. But if I printed it on the white paper, I would have needed to cut the decal out extremely precisely to make it look right and I wasn't sure I could do it. So I printed out a version of the seat tube design on both the transparent paper and the white decal paper. Then I cut out the transparent version with plenty of spare room around the design. I put that on the seat tube the usual way you apply water-slide decals. As expected, the light versions of the decal were completely swamped by the frame color. Then black was fine. Finally, I cut out the white decal version with a razor blade, cutting right along the edge of the design. This gave me a decal that was the right size and with the right colors, but with little white edges on the outside, where the white decal showed up against the black border of the design. Then I took a black marker and carefully darkened the very edge of the decal and, when the ink was dry, applied it right on top of the previously applied transparent version. The result was an acceptably colored decal, showing up as I wanted against the dark colored frame, with relatively even black borders. Back to Doug Shaker's Centurion Mixte |
|
|
|
|
 For
this project, I created decals with decal paper from
For
this project, I created decals with decal paper from
Current
Classics Photo Gallery - Cross Bike
Photo Gallery
Single Speed Garage Photo Gallery -
Working Bikes & Practical Solutions