|
"Gear" Rivendell Baggins Hobo Bag - Ritchey Aero Road Wheelset - Ritchey Cross Cranks Rivendell Baggins Hobo Bag (2005):
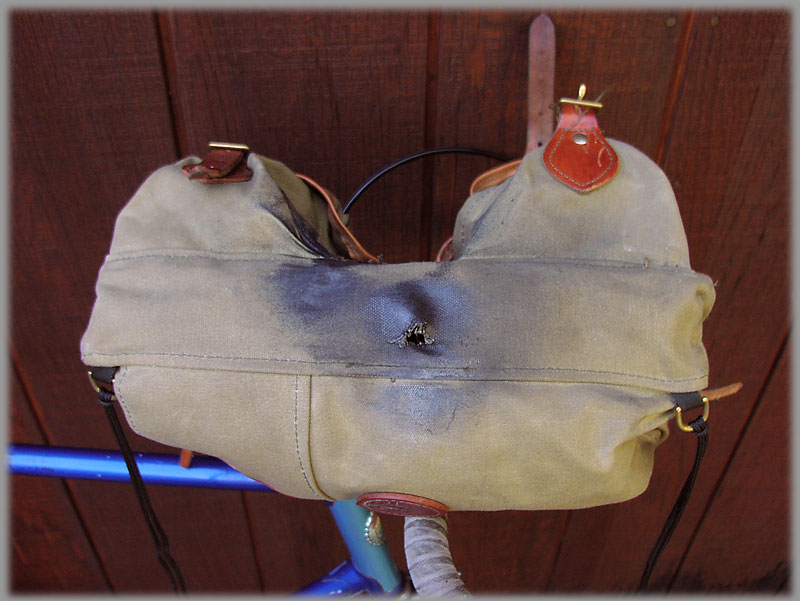
I was also going to try bending a piece of welding rod so it went under the stem and over the bars very close to the stem, then splayed and parralleled the rear outside pockets. My idea was that it would reduce the side to side motion and help hold it out a bit. It also seems that if I had two non-aero brake housings rather than one (running front brake only on this fixed), they would help positon the bag. The single housing runs just inside the rear outside pocket. If I bend up the hobo holder, I'll post a photo. After running this bag for most of the summer commute season, there's a definite bit of discoloration where the brake cable and brake was rubbing on the backside. Other than that, it's good. It actually performs better when there's more stuff in it - otherwise it does sag in the middle just a bit. If I could add a bit to the design of the bag itself, I'd put a single compression strap on it, dead center front. That way, when it didn't have as much stuff in it, I could "suck up" the excess. I've also seen a few designs of front bag braces which make sense - one looks like a rod brazed to a spacer which would fit into the the headset. Very simple and it looks like it would work.
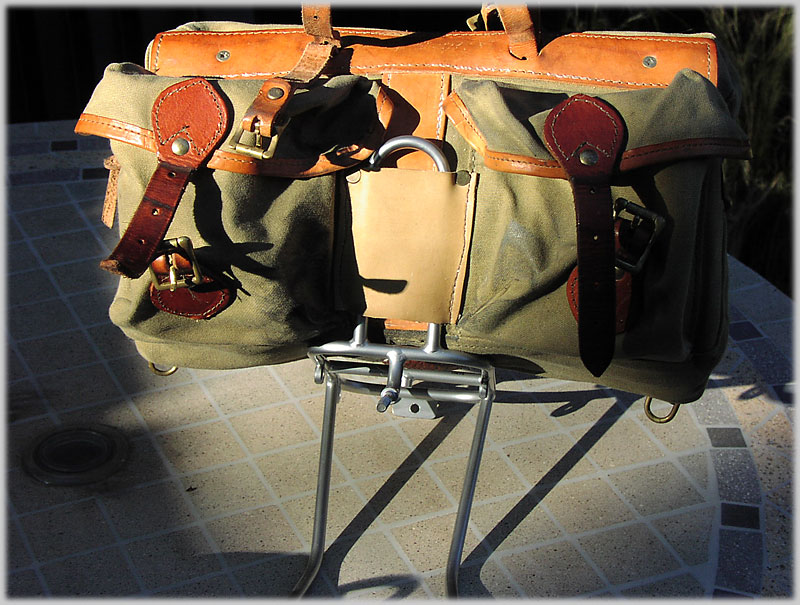
Managed to put a hole in the bad from contact with the front brake nut. I think the core issue was that it was moving on the handlebars, due to me packing a lot of gear and the occassional light battery in it. Combine that with a bit of benign neglect due to a longer than normal rainy spring and there you have it... While getting that fixed, I had the shoe repair place add a bit of leather so that it could go only my Nitto front rack that I bought for the Quickbeam. More of a complete story here. Ritchey Aero Road Wheelset (2001) I've been running a set on my cross bike since the bike was built up back in November (2000). It's the set with the aero/flattened spokes: "Z-Pro" with 28 spoke front, radially laced, 32 spoke rear, 3X. Been riding mostly medium to rough singletrack, with descents, plus road work & light commuting. I'm about 175-80 pounds. Here
are my experiences: 1 - out of the box rubbery-squeal-squeak from rear hub, especially at slow speeds. Disassembly of rear hub (easy - two small hex bolts) and reassembly made it disappear.
2 - significant lateral flex in rear wheel. Tire rubbing chainstay
during hard climbing. Increased tension in rear wheel/stress-relieved/retrued.
2.5 - rear wheel popped out of dropouts under load on a steep hill. See "Bad thoughts" below. 3 - significant detensioning of spokes in rear wheel. Increased tension again/stress-relieved/retrued. 4 - Detensioning continued over the next 2 - 3 rides. Reread FAQ about spoke tension/stress-relieved, visited Sheldon's site re: same. Finally, pulled out the truing stand with a free evening, wore gloves to be able to grab and squeeze the spokes (those aero spokes'll hurt...) and brought the tension up again. This seemed to have reduced the problem significantly. There's still some retruing necessary after running them over the rocks for a couple hours, but now it's mostly minor adjustments. 5 - Lateral flex occurs periodically to the point where the tire rubs on the chainstay. This happens while riding up steep hills/trails out of the saddle, especially when one of my feet is at the bottom of the pedal stroke. Increasing tension reduces/eliminates this. I am not positive that the tires are rubbing the chainstays, but that is what seems to be happening. It seems to happen if the wheels get out of true from impact or if they detension slightly. 6 - The welds are not finished, and the rear wheel seam is uneven on one side, causing a little hop when truing. I don't notice it when I ride.
Bad thoughts: I don't think I should've had to disassemble the hub to fix that noise. It was very noticeable out of the box. I don't care for the QR's. I _know_ how to use them, but for some reason this (sorry Tom) Salsa-like design goes from too-light to too-tight very quickly. I am very careful while I use these. I will be replacing them. Good
thoughts: Final
thoughts: 5/12/01
-
September
update: 9/20/01 - I've ridden these wheels pretty heavily now for a few weeks. Very minor retruing after a particularly nasty rear tire pinch-flat blowout coming down Eldridge Grade from the top of Mt Tam. Otherwise, combining the standard spokes with the OCR and hub has been really nice. I particularly like the even tension, and the fact that the tire no longer rubs against the chainstays under hard climbing. The front wheel has been holding up well, and despite my inherent lack of fondness for a radially spoked wheel, has given no problems. EPILOG
-
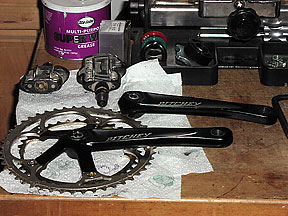
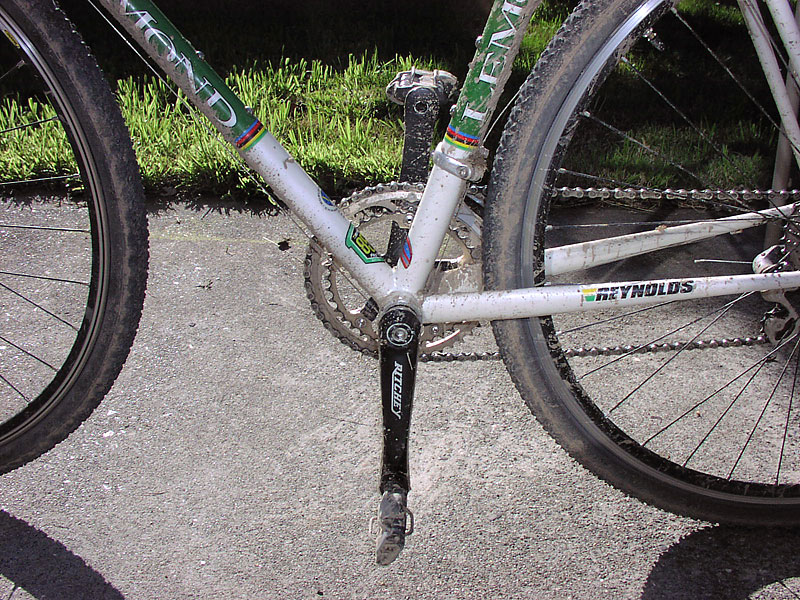
Ritchey Cross Crank Saga (2005/2006) You have to understand that I'm not mad about this. The end result is that Ritchey followed through and replaced what I'm assuming was either a bad run or a problem with manufacturing standards. I'm using the cranks now (8/06) and they work, aren't slipping and the bolts are staying tight. But, here's how I got here... I wanted to replace the cranks on my cross bike. I'd been running a set of Profile Carbon cranks (shown in the photos on this page), but had two issues with them - (1) the crankarm length was 175 mm, which was leading to some pedal strike on trails, and may have been contributing to some fit issues, and (2) the second set of these cranks had cracked. (Digressing quickly - the cracking occurred in a slow delamination around the pedal hole - they literally felt "squishy" when I pedaled, and I could see the gaps in the fiber extending away from the threaded insert. Nothing snapped or failed catastrophically. Both pair were replaced without question by Profile-Design.)
Upon removal of the crank arm, it had clearly stripped - with obvious widening of the spline pattern on the inside - lots of freshly worn, bright aluminum showed. I
felt a little bad, as I guess I should've paid more attention to
the tightness of the bolt. On the other hand, I had torqued the
bolts pretty heavily - probably in excess of spec - and also tightened
the "one-key" removal caps down as hard as the pin tool
would allow. Unless there was something really off in the bb or
perhaps a bent pedal axle, it didn't seem reasonable for them to
loosen. An email to Ritchey USA got a quick response, and soon my cranks were down in Redwood City, getting microscopically evaluated in the hermetically sealed clean rooms. Or, they got quickly looked at and casually tossed into the "go-back" pile. Whatever the procedure, I had new cranks within a couple weeks, package out to package received. I carefully lined up the splines and mounted the new cranks. Again torquing and fixing the bolts to the best of my ability. I rode the bicycle a few times and things seemed to work OK. I had been getting a pain in my low left back during the latter half of rides, which I thought might be related to not having ridden the cross bike on trails too recently. Then, when cleaning the bike, something looked "off". The cranks did not line up. In fact, I could get them to shift between aligned and skewed by putting my weight on them while sitting on the bike, and putting the opposite foot forward or back and forcing just a bit. So, these went back to Ritchey.
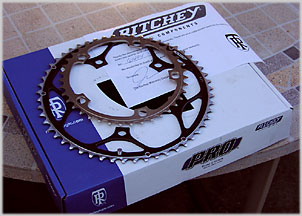
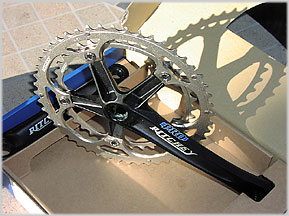
This time not too much happened for a while. It wasn't noticeable, as I had gotten my Quickbeam, and what time I wasn't spending riding that was spent on too much work. Also, my hip still felt sore from the nasty trail crash I'd had the previous fall. I finally realized that the cranks had been gone a couple months. I was able to easily get ahold of the warranty guy, who explained that they were waiting for a new forging, which should be in soon. Another week or so passed, and then a set of cranks showed up at the door. These definitley had a different shape to the spider, and in fact, included a set of loose "road" size chainrings (i.e. 53/39), in addition to the "cross" set (48/38) which were on the crank arms. I'm guessing that they decided to use the Pro Road forging and put the other chainrings on.
This time, everything worked and (knock wood) has been holding nicely. I did notice that the bolts came with a copious amount of blue loctite on the threads, which seems to now (after about three strong torque sessions) seem to be holding. I've had a couple of decently long mixed terrain rides (documented here and here) which contained enough climbling to test the strength of the splines. So, they seem to be working. Overall - I'm very positive about these cranks. They aren't the super-stiff mono-block constructions which are all the rage right now, but they are light and tight to the frame and work well.
|
||
|
updated: August 17, 2006 |

 I
purchased these cranks through Colorado Cyclist in early 2005. They
required a Shimano Octalink bottom bracket. This was ok, as I had
been using one for the previous crankset. I didn't really get them
on the bike too quickly, but around mid-year, had taken them out
on a ride or two. The crankarm bolts didn't really like to stay
stuck - they kept looseing slightly during the rides, so I had taken
to bringing my long 10mm hex wrench with me. Then on one ride, the
non-drive arm loosened noticeably, and upon being tightened, was
loose again with a few hundred yards. Luckily, I was on some trails
near home, so I tightened and limped, tightened and limped until
making it back.
I
purchased these cranks through Colorado Cyclist in early 2005. They
required a Shimano Octalink bottom bracket. This was ok, as I had
been using one for the previous crankset. I didn't really get them
on the bike too quickly, but around mid-year, had taken them out
on a ride or two. The crankarm bolts didn't really like to stay
stuck - they kept looseing slightly during the rides, so I had taken
to bringing my long 10mm hex wrench with me. Then on one ride, the
non-drive arm loosened noticeably, and upon being tightened, was
loose again with a few hundred yards. Luckily, I was on some trails
near home, so I tightened and limped, tightened and limped until
making it back.
The Fifully Produced Cyclofiend blog
Bicycle Photo Galleries :
Current Classics Gallery - Cyclocross Bicycle Gallery
Single Speed Bicycle Gallery - Working Bikes & Practical Hardware
Coffee-Fueled Race Reports:
-- Click here to subscribe to Cyclofiend.com Daily Updates! --
Contact Info - Bicycle Links Page
Please
note: Images and words ©Jim Edgar 1999 - 2005
No reuse of any kind allowed without specific permission.
Thanks.